
Osaka’s railway network can look confusing when you first arrive. JR, the Osaka Metro and several private railway companies all operate in the same city, while stations connected by underground passages may have completely different names.
Fortunately, paying for most ordinary journeys is much simpler than understanding the entire railway map. A transport IC card allows you to enter and leave stations by tapping at the ticket gate, without buying a paper ticket for every trip.
In the Kansai region, the best-known transport IC card is ICOCA. However, you do not necessarily need to buy one. If you already have a Suica, PASMO or another major nationwide-compatible transport IC card, you can normally continue using it in Osaka.
For travellers without a card, this guide explains how to choose, charge and use an ICOCA, navigate transfers and resolve ticket-gate errors.
Do You Need an ICOCA Card in Osaka? (ICOCA vs Suica & PASMO)
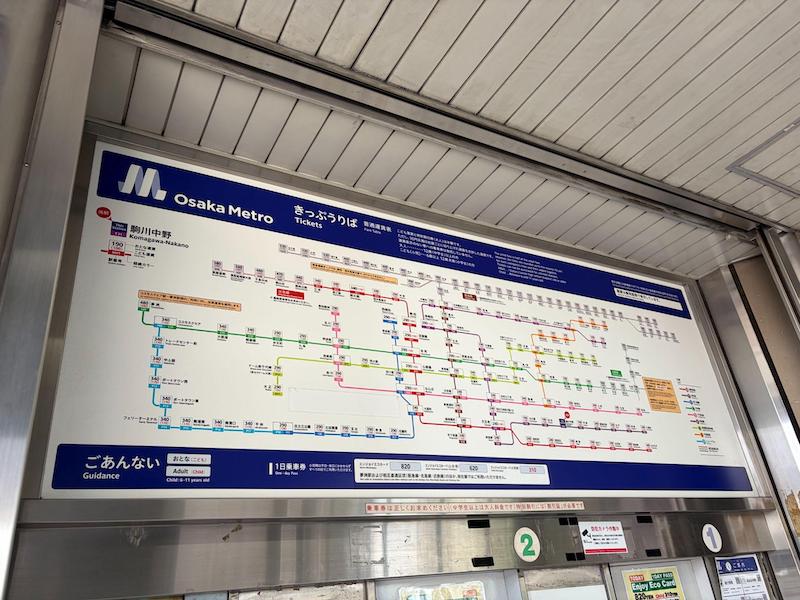
Before buying anything, check whether you already have a Japanese transport IC card.
ICOCA is issued by JR West, while Suica is associated with JR East and PASMO is widely used in the Tokyo area. For most visitors, however, the differences between these cards are not as important as they may initially appear.
Nationwide IC Card Interoperability Explained
Major transport IC cards in Japan participate in a nationwide interoperability system. This means that Suica, PASMO, ICOCA and several other cards can be used in many participating railway, subway and bus areas across the country.
In practical terms, someone travelling from Tokyo with a Suica does not need to purchase an ICOCA simply because they have arrived in western Japan. The same applies to a Suica or PASMO stored in Apple Wallet. As long as the card has enough credit, it can normally be used for everyday journeys around Osaka.
Buying an ICOCA makes sense if you do not already have a compatible card, expect to use public transport several times or want to avoid purchasing individual tickets.
Browse More Regional Experiences in Osaka here.
Express Trains, Shinkansen, and Separate Fare Exceptions
ICOCA can be used on JR West trains, the Osaka Metro and many private railways and buses in the Kansai area. It is also accepted by many convenience stores, vending machines and other shops displaying the relevant IC payment mark.
However, an IC card is mainly a way to pay ordinary fares. It does not automatically include every ticket required for every train.
Limited express services, reserved seats and the Shinkansen may require a separate ticket, reservation or additional charge. Always check the conditions when using a special or long-distance train.
Physical ICOCA vs. Mobile ICOCA (Apple Pay Setup)
Travellers without an existing transport IC card have two main options: purchasing a physical ICOCA or adding a mobile ICOCA to a compatible Apple device.
Both perform the same basic function at ticket gates, but the better choice depends on your device, payment method and personal preference.
Buying a Physical ICOCA: Costs, Deposit, and Cash Needs
A physical ICOCA is easy to understand and does not depend on your phone battery. Standard cards can be purchased from compatible ticket machines and JR West ticket offices.
A standard initial purchase usually costs ¥2,000. This includes ¥1,500 of usable credit and a refundable ¥500 deposit.
At a compatible ticket machine, switch the screen to English, select the option to purchase an ICOCA and follow the instructions. Physical ICOCA cards are generally purchased with cash, so it is sensible to prepare some Japanese yen before arriving at the machine.
When passing through a ticket gate, you may be able to leave the card inside a simple wallet or card holder. However, avoid keeping it directly beside another transport IC card.
If two transport cards are presented to the reader at the same time, the machine may not know which one to use. Coins and some other cards may also interfere with the reading process.
A physical ICOCA is a good choice if you do not want to use your phone at every station or are concerned about losing battery power during a full day of sightseeing.
The main disadvantage is that you may need cash to purchase or charge it at some machines.
Setting Up Apple Pay Mobile ICOCA as Express Transit
Apple Pay’s ICOCA can be added to a compatible iPhone or Apple Watch through Apple Wallet or the ICOCA app. You can create a mobile card even if you do not already own a physical ICOCA.
Once the card is added, it can be used at ticket gates by touching the iPhone or Apple Watch to the IC reader.
When set as an Express Transit card, ICOCA can be used by touching the iPhone or Apple Watch to the reader without opening Apple Wallet or using Face ID. The first transport card added is normally selected automatically, but travellers with multiple cards should confirm which one is active.
Mobile ICOCA is particularly convenient for travellers who do not carry much cash. You can check the balance and add money using a supported payment card without searching for a ticket machine.
If you already use Mobile Suica or Mobile PASMO, there is usually no reason to create a mobile ICOCA specifically for Osaka. You can continue using the card that is already set up.
How to Buy and Charge Your Transport IC Card
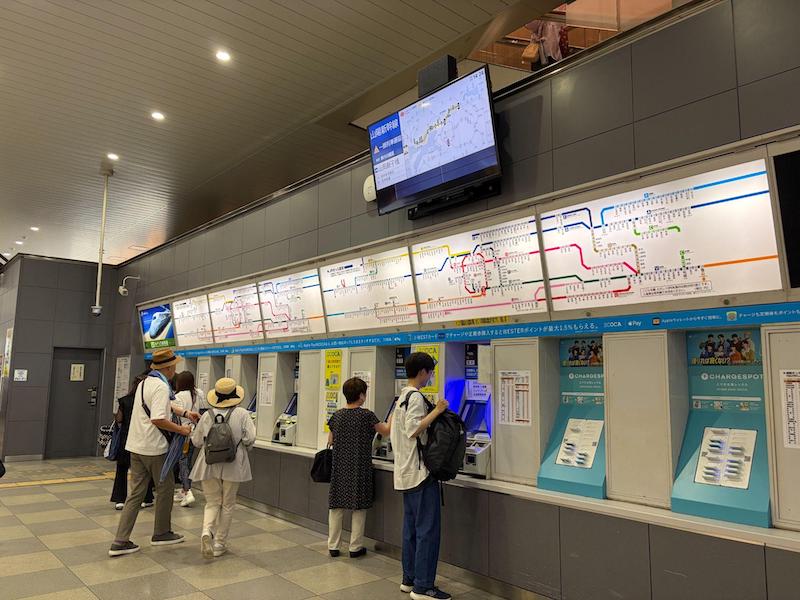
Physical ICOCA cards are available from ticket machines displaying the ICOCA symbol and from JR West ticket offices. Many machines at major stations offer English-language instructions.
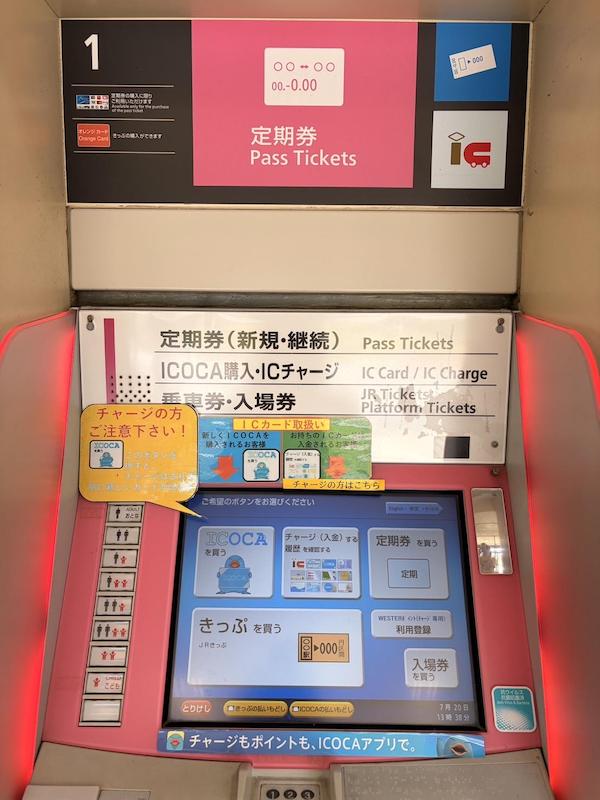
After purchasing a physical card, you can add more money at compatible ticket machines, charge machines and fare adjustment machines.
Place or insert the card as instructed, select the amount and pay. Physical-card charging is often cash-based, so carrying some yen remains useful even if you generally prefer cashless payments.
Charging with Cash at Convenience Stores vs In-App Top-Ups
Physical ICOCA cards can also be charged with cash at participating convenience stores and other locations displaying the appropriate IC mark. Tell the cashier that you want to charge your card, place it on the reader and pay the selected amount.
With Apple Pay’s ICOCA, you can normally charge the card through Apple Wallet or the ICOCA app using a supported payment card. This is useful when you notice that your balance is low while walking to the station.
You do not need to add a very large amount immediately. Check the estimated fare in a navigation app, keep enough credit for the next several journeys and add more before the balance becomes extremely low.
How to Use an IC Card on JR and the Osaka Metro
Using a transport IC card at a normal railway station involves two taps: one when entering and one when leaving.
At the entrance gate, find the illuminated IC reader and place your card, iPhone or Apple Watch against it for about one second. When the card is read successfully, you will hear a sound and the gate will open.
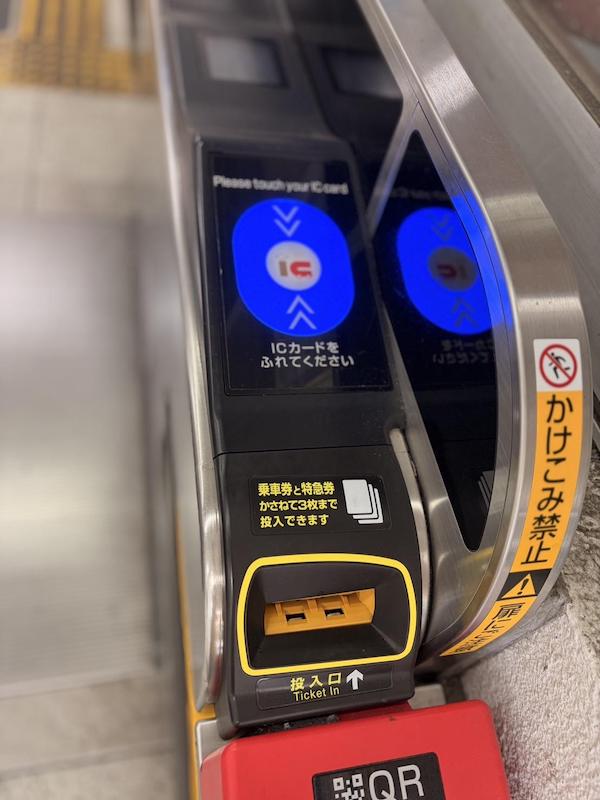
At your destination, touch the same card or device to the exit gate. The correct fare will be calculated and deducted from the balance automatically.
Always use the same card when entering and leaving.
For example, do not enter using a physical Suica and then attempt to leave using an ICOCA stored on your phone. The exit gate will not find the correct entry record.
Transferring Between Different Railway Operators Using IC Cards
The basic process is almost identical on JR and the Osaka Metro, even though they are operated by different companies. You can use the same compatible IC card on both networks.
When changing from JR to the Metro, you will often leave the JR ticketed area, follow signs to the Metro station and touch into the next network through a different gate. Each operator deducts the relevant fare from the same card balance.
Finding the Best Routes: Using Google Maps for Transit Navigation
You do not need to work out whether JR or the Osaka Metro is better for every journey. The easiest option is usually to search for your destination in Google Maps and follow one of the suggested public transport routes.
Platform Numbers, Car Positions, and Station Exits
Google Maps normally shows the railway company, line, direction of travel, transfer stations and estimated journey time.
It may also provide useful details such as the platform number, the best carriage or boarding position for an easier transfer and the station exit closest to your destination.
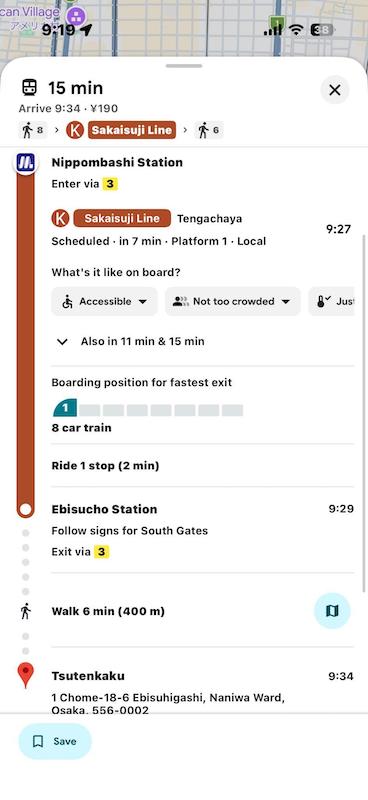
These details can make a significant difference. A large station may have many exits, and leaving from the wrong one can add a long walk to the journey. Similarly, boarding near the correct carriage can place you closer to the stairs, escalator or passage needed for the next connection.
This is especially helpful in large station areas such as Umeda and Namba, where several railway companies operate separate stations with similar names.
Before entering the station, check the railway company, line, direction and final exit shown in the route.
How to Find Transfers Without Getting Lost
Transfers become easier when you look for the railway company as well as the station or line name.
JR, Osaka Metro, Hankyu, Hanshin, Nankai and Kintetsu are separate railway operators. Their stations may be connected by corridors or located close together, but they do not necessarily share the same ticket gates.
Signs often display the railway company’s name or logo. Follow signs marked “JR Lines” when changing to JR, “Osaka Metro” when changing to the subway or the name of the relevant private railway shown in your route.
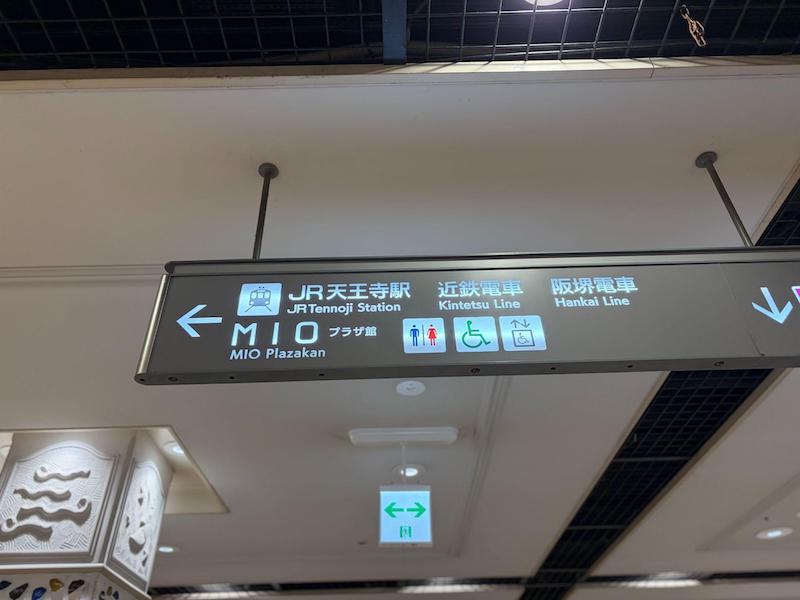
Do not search only for your final destination. First identify which railway company operates the next train.
Navigating Complex Transit Hubs: Umeda and Namba Stations
This is particularly important in Umeda. JR Osaka Station, the private railway stations called Osaka-Umeda, the Midosuji Line’s Umeda Station, Higashi-Umeda Station and Nishi-Umeda Station are all located in the same wider district.
These stations are connected by streets, buildings and underground passages, but walking between them may take longer than expected. The transfer may feel less like moving to a nearby platform and more like walking to another station.
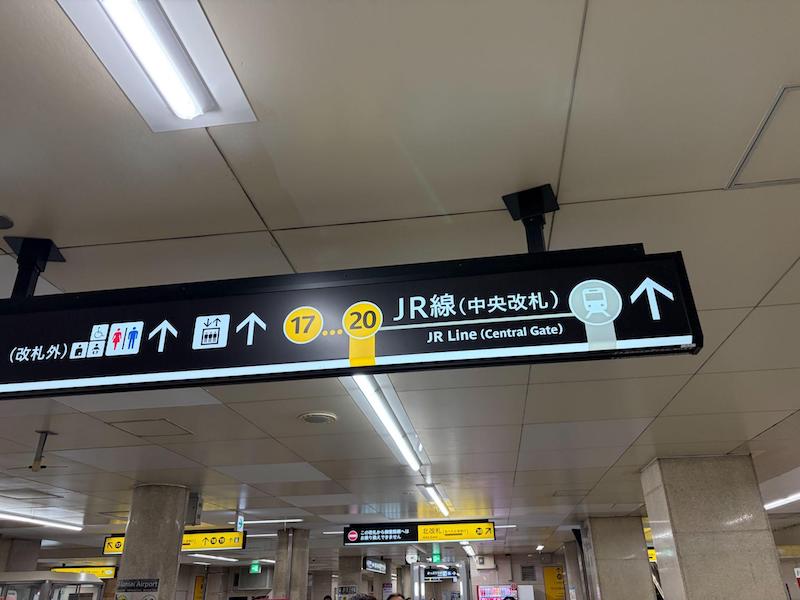
Namba presents a similar challenge. Osaka Metro, Nankai, JR and other railway companies operate stations in the area, and several may appear simply as “Namba” in English.
Match the operator, line, direction and platform shown in Google Maps with the station signs before boarding.
Read More: Anime Fan’s Guide to Osaka
How to Fix Ticket Gate Errors & Low Balance Issues
A closed ticket gate can be inconvenient, but the problem is usually easy to resolve.
If the error occurs when leaving and your balance is too low, look for a nearby fare adjustment machine. It may be labelled “Fare Adjustment” in English or display Japanese terms such as “精算” or “のりこし精算”.
Using the Station Fare Adjustment Machine (精算機)
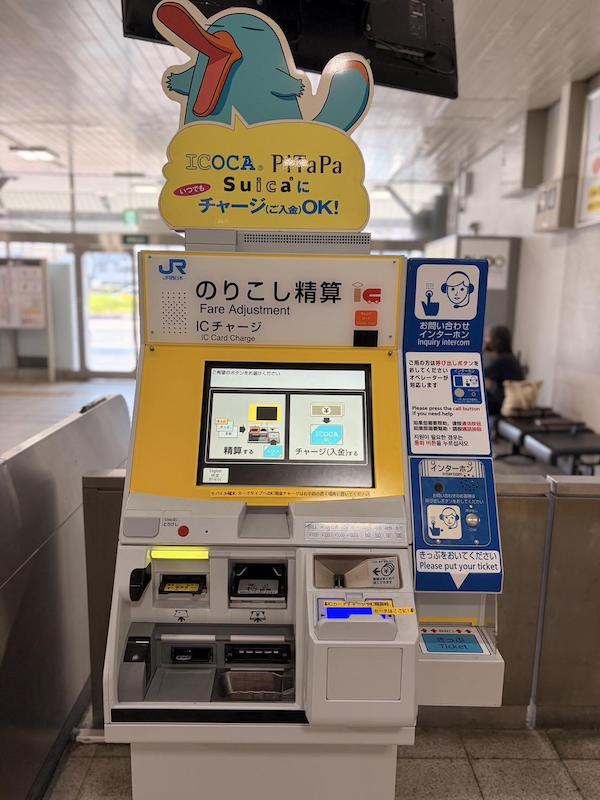
At both JR and Osaka Metro stations, use the fare adjustment machine to add credit or settle the outstanding fare. After completing the adjustment, return to the exit gate and touch the same card again.
The machine may not always allow you to add only the exact amount missing. Depending on the system, you may need to select one of the available charging amounts.
Handling Card Read Errors and Staffed Gate Assistance
The reader may not have detected the card correctly, another IC card may be interfering or you may be trying to leave using a different card from the one used to enter. A previous journey record may also remain unresolved on the card.
Do not repeatedly touch the same wallet against the reader if it contains several different cards. Remove the transport card you used and try touching it by itself.
If you entered using a mobile card, check that you are using the same device and transport card at the exit.
If the problem continues, go to the staffed ticket gate and show the card or device to a station employee. Station staff regularly assist passengers with entry records, insufficient balances and incorrect taps.
Keeping a small amount of cash is still helpful, even if you mainly use a mobile card. You may need it to charge a physical card, use certain machines or resolve an unusual fare issue.
Osaka’s Trains Are Easier Than They Look
Osaka’s railway network may seem complicated at first, but you do not need to memorize every line or understand every railway company before you travel.
A compatible IC card handles most ordinary fares, Google Maps can guide you towards the most practical route, and station signs help you find the correct operator, platform and exit. Even if something goes wrong at the ticket gate, fare adjustment machines and station staff are available to help.
Once you understand these basic steps, travelling by train becomes a simple part of the journey rather than something to worry about. With your card ready and your destination entered, you are prepared to explore Osaka.

Nao is an Osaka based writer with a love for travel and anime. She loves exploring the Kansai region and hopes to inspire readers to visit Japan for their own pilgrimage experiences.
